Inquiry Functions
|
Customer Inquiry |
Last Revised: 11/18/16 |
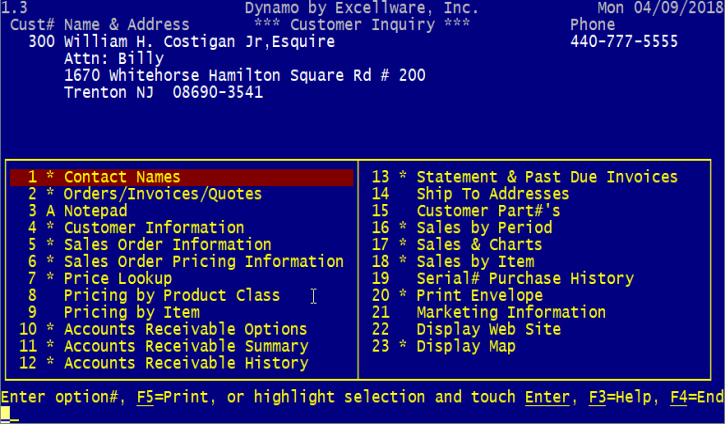
Customer Inquiry is used to display related information on file for a particular customer.
The operator will be asked to enter a customer by customer number, alpha sort name, phone number, or zip code. Once the customer has been entered, the screen will display the customer number, name and address, the primary contact, and the telephone number.
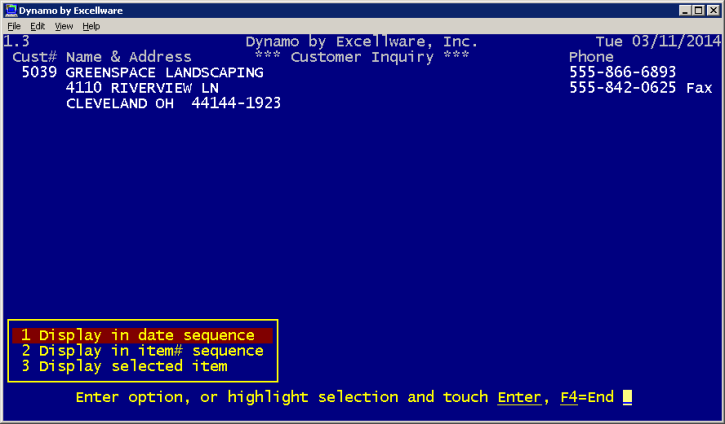
If an * is entered, the operator will be able to view customers to contact based on the Call Back Date stored in Customer Maintenance. The call backs that display are from today to 3 days into the future. If the operator wishes to change the salesman to view call backs for, enter an * at the prompt for selecting the customer# to call back.
At this point, a window will display with all of the options that are available through Customer Inquiry.
| Customer Inquiry | ||||||||||
|---|---|---|---|---|---|---|---|---|---|---|
| Second Column Codes | ||||||||||
| Blank | A blank in the second column means that this option is not available for the customer at this time because there is no information to display. | |||||||||
| * | The asterisk denotes that there is information available for the customer in this option and may be selected. | |||||||||
| A |
This code means that there is no information to display for the customer but the option is still available to enter information. When this code appears in the second column it means that this option is selected for printing.
To toggle between printing an option and not printing an option, just select the option and you will see the code in the second column change to an *. When the asterisk appears in the second column during print mode it means that the option has been deselected from printing. To reselect the option to print, select the option again and you will see the code switch back to a P. |
|||||||||
| P |
This code will only display when the print option is selected. When this code appears in the second column it means that this option is selected for printing.
To toggle between printing an option and not printing an option, just select the option and you will see the code in the second column change to an *. When the asterisk appears in the second column during print mode it means that the option has been deselected from printing. To reselect the option to print, select the option again and you will see the code switch back to a P. |
|||||||||
| OPTIONS | ||||||||||
| 1. Contact Names | This option may be accessed at any time for entry or changing of information. | |||||||||
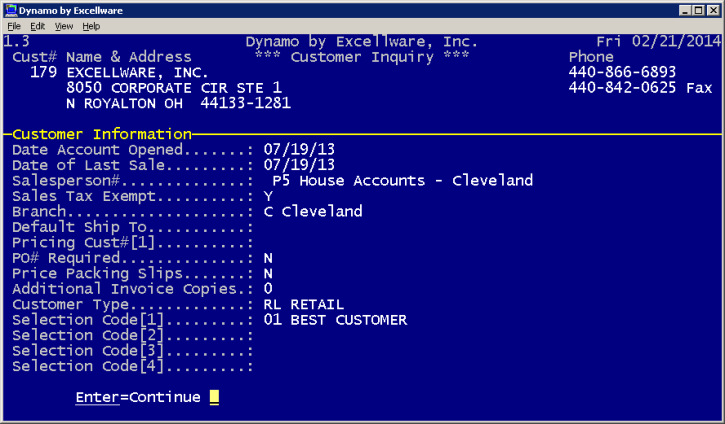
| 2. Customer Information |
This option displays general information about the customer, as shown below:
|
|||||||||
| 3. Notepad | The customer notepad option is used to display all customer messages currently on file and to allow modifications or additions to them. The following are the four different customer messages available: general, sales orders, receivables and salesman options. The ability to modify or add messages is available to operators with a security level of 3 or greater. All operators may view the current messages. | |||||||||
|
4. Orders/Invoices/ Quotes |
This option displays all quotes and orders on the system for the customer. The information is displayed in the order of Date, Sales Order#, Status, Invoice#, Branch, Warehouse, PO#/Reference, and the Order Value. Touch "Enter" to display the highlighted order in Sales Order Inquiry. |
|||||||||
| 5. Price Lookup | Search for an item to look up the customer's price. | |||||||||
| 6. Pricing by Product Class |
If the customer has any prices set up by product class, they will be displayed here.
|
|||||||||
| 7. Pricing by Item |
If a customer has any prices set up by item, they will be displayed here.
|
|||||||||
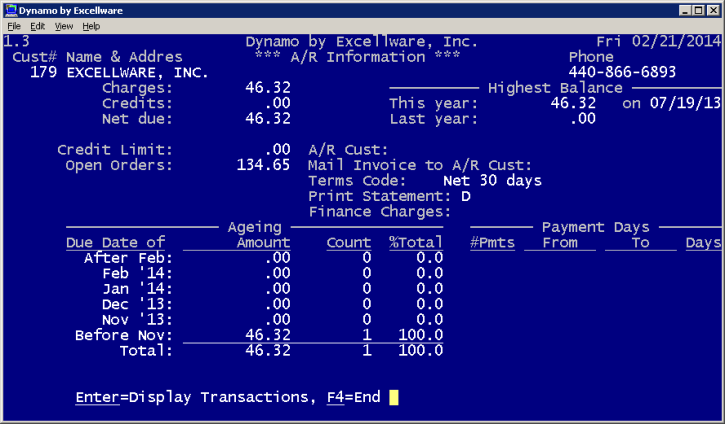
| 8.Accounts Receivable |
|
|||||||||
| 9.Accounts Receivable History |
This option allows the operator to see all of the A/R transactions which collectively equal the customer's balance. The information is displayed in the following format:
The operator may then choose to see more detail for one particular transaction by entering its line number. |
|||||||||
| 10. Statement & Past Due Invoices | This option can be used to print, email, or fax the Statement of Account for the selected customer and, if specified, all invoices that are past due for the customer. | |||||||||
| 11. Ship to Addresses | This option displays the alternate addresses where this customer's merchandise may be shipped. | |||||||||
| 12. Customer Part #s | If any customer part numbers have been entered using Customer Maintenance, then they will be displayed here. | |||||||||
| 13. Sales by Period | Allows you to view all customer sales by months, quarters or years. Reports, which can also be printed, include gross margin percentage, total sales dollars, and number of sales made to the customer during the period. | |||||||||
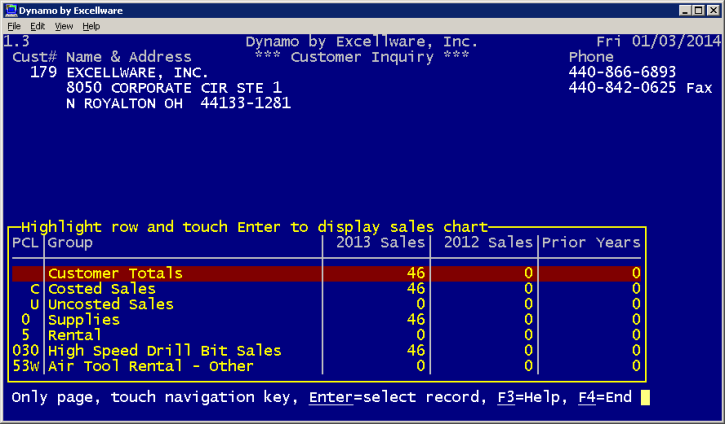
| 14. Sales & Charts |
Create a sales chart for a customer by choosing one of the options listed. For example:
A chart just like on the Sales & Charts application will display. |
|||||||||
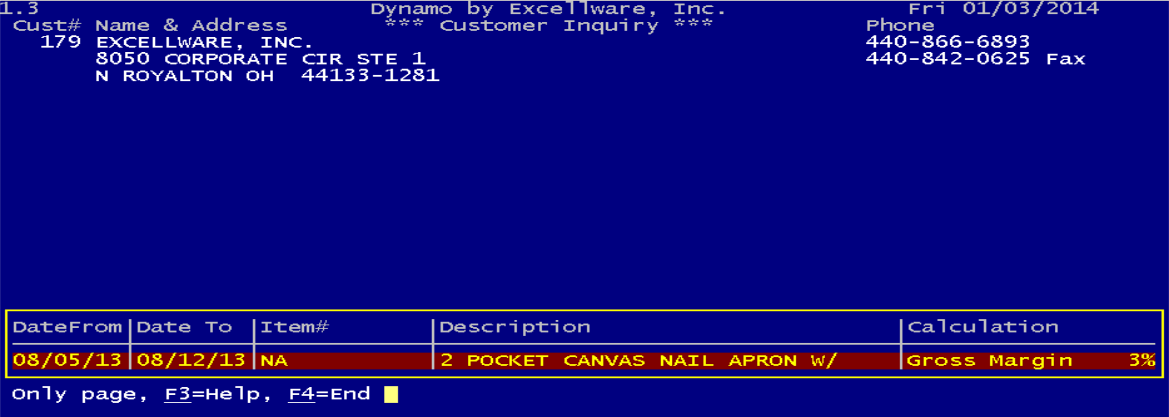
| 15. Sales by Item | This option displays sales history for all items sold to this customer. The operator may enter an item number or may hit F2 to display all items with sales history for the customer. | |||||||||
| 16. Serial# Purchase History |
This option displays all customer purchases of serialized items.
|
|||||||||
| 17. Print Envelope | Print an envelope with the information of a contact at the currently open customer company. | |||||||||
| 18. Display Web Site | Selecting this option will open a browser window with the web address specified. | |||||||||
| 18. Display Map | Selecting this option will open a browser window with a map showing the customer's address as specified in Customer Maintenance. | |||||||||